SAASPASS MAIN MENU & SETTINGS
HOW TO USE SAASPASS AS A COMPANY
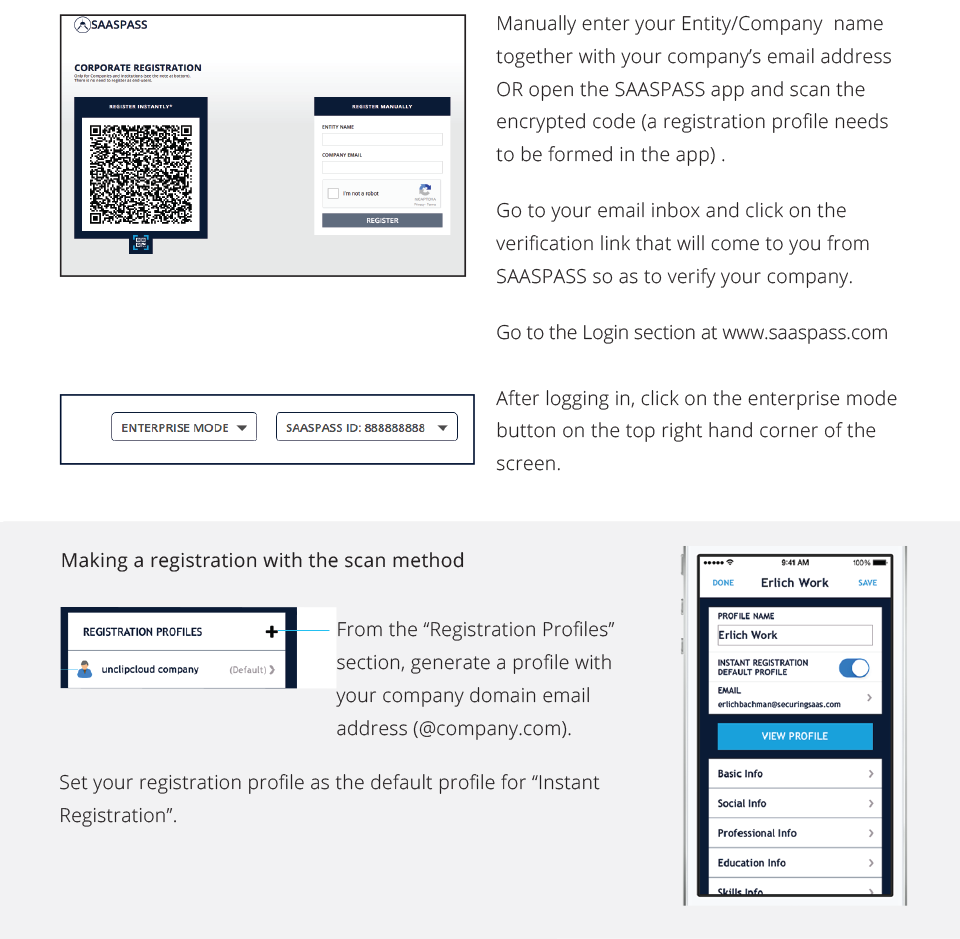
1) Download and Use SAASPASS
Download SAASPASS from the Apple Store, Google Play, Blackberry World, Amazon App Store or visit www.saaspass.com/download for all platforms and the download links.

If you would like to register as the admin of a company first set up SAASPASS on your phone. Right after, either click here or go to this link: https://www.saaspass.com/sd/#/companyRegistration
SAASPASS Active Directory
Integration
INTRODUCTION
SAASPASS Active Directory integration allows you to continue managing your users and role groups as you always do, allowing you to synchronize SAASPASS with your AD seamlessly, avoiding duplication of tasks. Once you add your Active Directory in the SAASPASS web admin console and install the SAASPASS Active Directory Agent, in just a few steps your user accounts will be ready to be protected. With its automatic synchronization, SAASPASS will always be up to date with the latest changes to your Active Directory accounts.
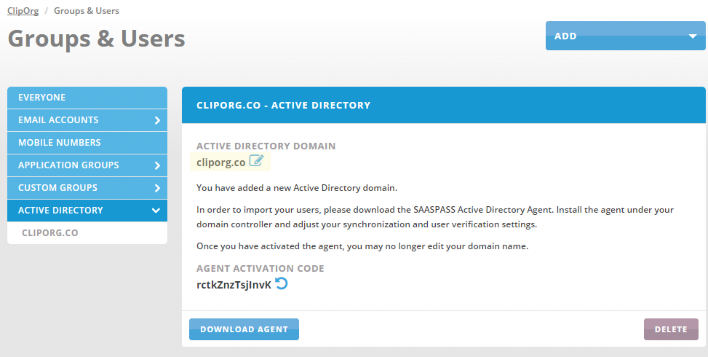
ADDING ACTIVE DIRECTORY:
1) Go to G&U and click on Active Directory
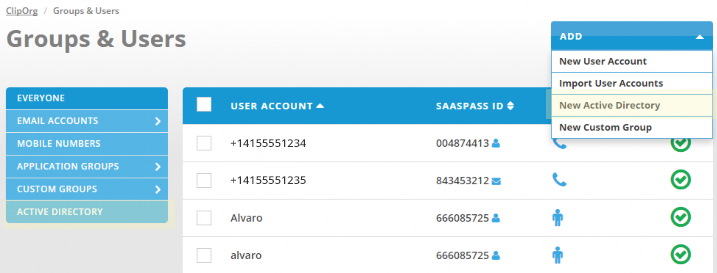
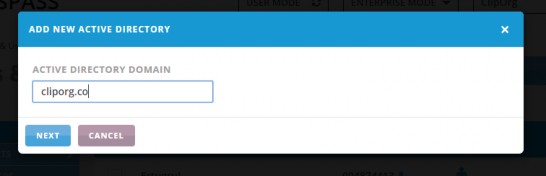
2) Enter your Active Directory name
3) Active Directory is now created under Groups and Users tree. For its final integration, copy the Activation Code displayed and download SAASPASS Active Directory Agent.
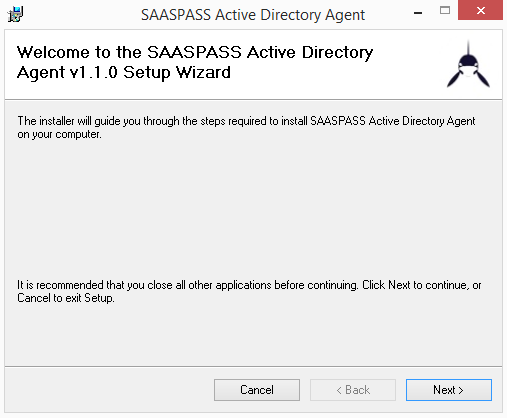
STEP 1
After downloading and starting the SAASPASS Active Directory Agent installation wizard, click on 'Next' to start with installation.
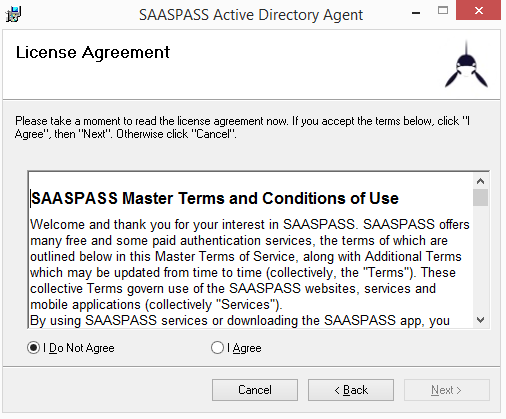
STEP 2
On the next screen you have the Terms and Conditions of Use, to proceed select 'I Agree' and click on 'Next'.
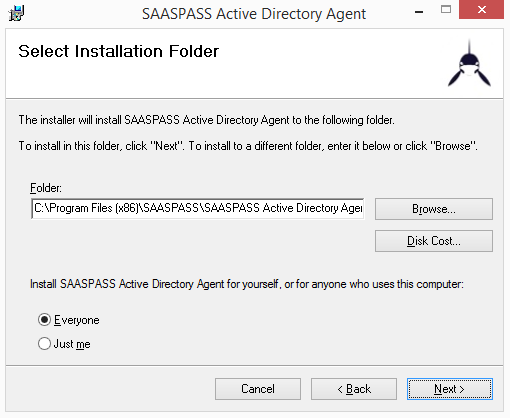
STEP 3
Next, you can choose the destination folder also you can see how much space will take on your Hard Disk and also you can choose which User/Users will have access.
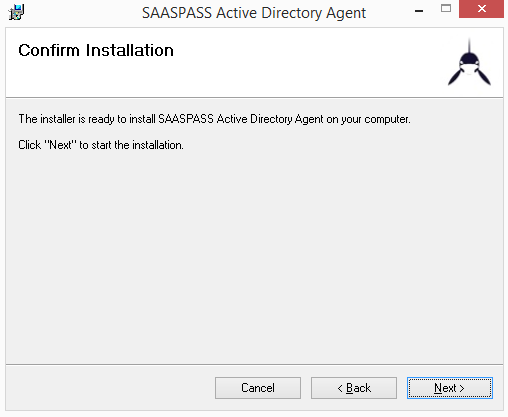
STEP 4
After finishing with all of the required settings, installer is ready to install your instance of SAASPASS Active Directory Agent, click 'Next' to start with the installation.
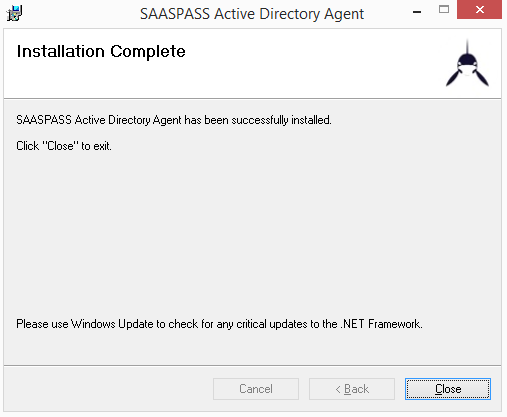
STEP 5
After installation finishes, click 'Close' so you can start with configuring the SAASPASS Active Directory Agent.
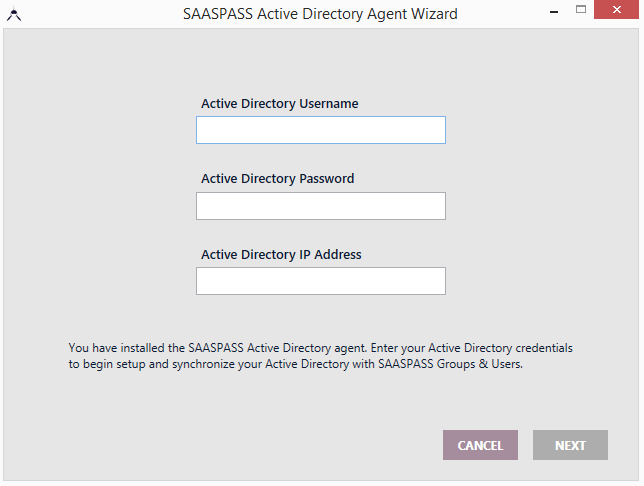
STEP 6
On the first screen of SAASPASS Active Directory Agent Wizard, enter your Active Directory Username, Password and IP Address.
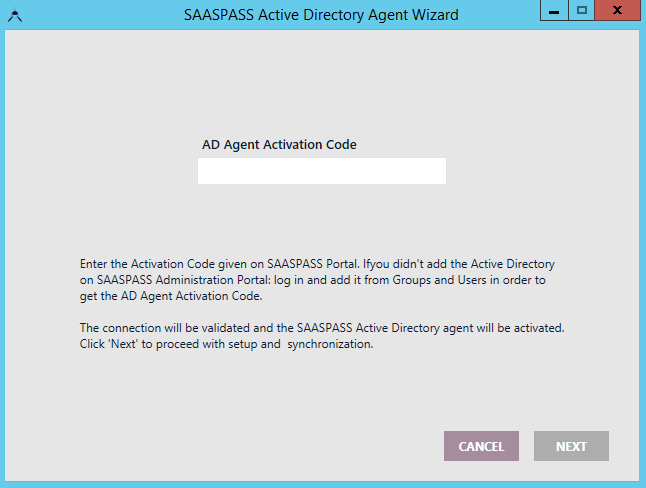
STEP 7
Next, from your SAASPASS Admin Portal copy the activation code for your AD Agent and paste it in AD Agent Activation Code field.
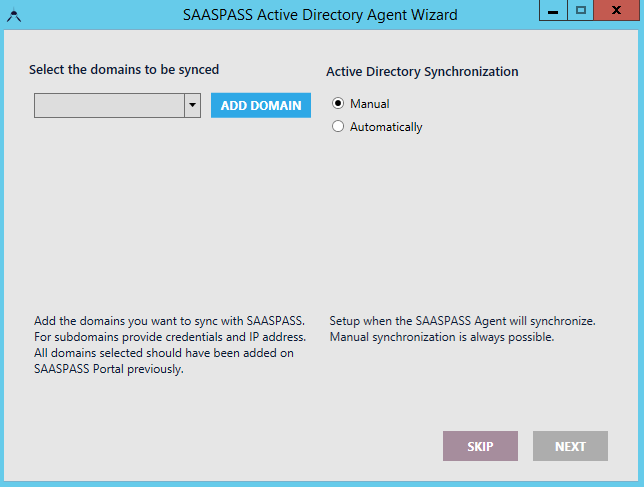
STEP 8
Next, choose which domain should be synced or add domain and also choose do you want Active Directory Synchronization to be done Manual or Automatically.
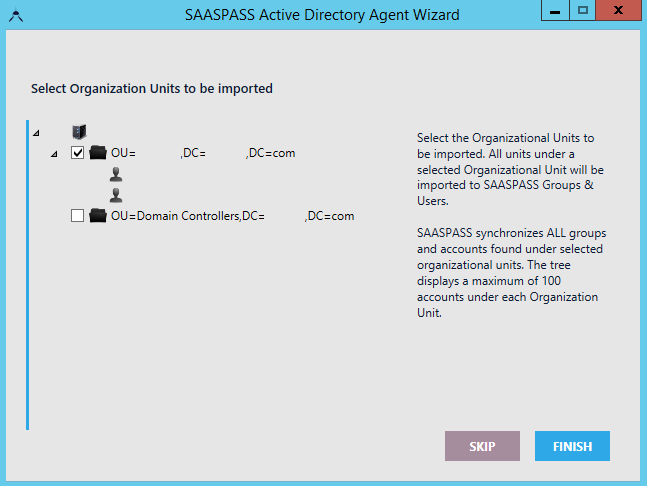
STEP 9
On the next screen, choose which organization units you want to be imported and click 'Finish'.
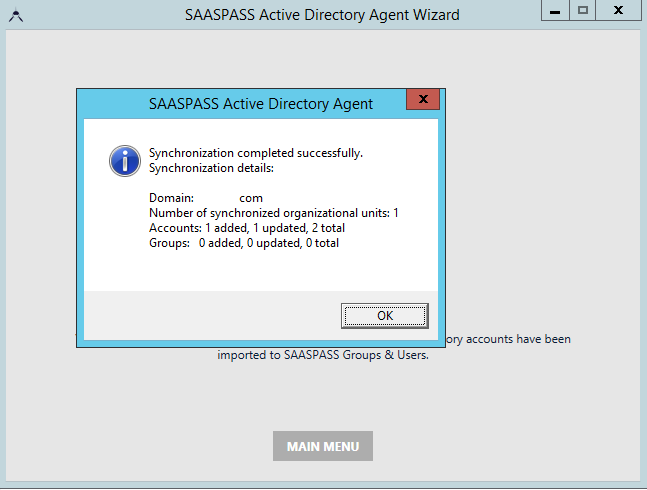
STEP 10
If everything is configured properly you will see a pop up with message, that synchronization was completed successfully. Click 'OK'.
STEP 11
After the synchronization is done, on the next screen you can edit your Active Directory Agent settings or if everything is okay, just click on 'Close' button.
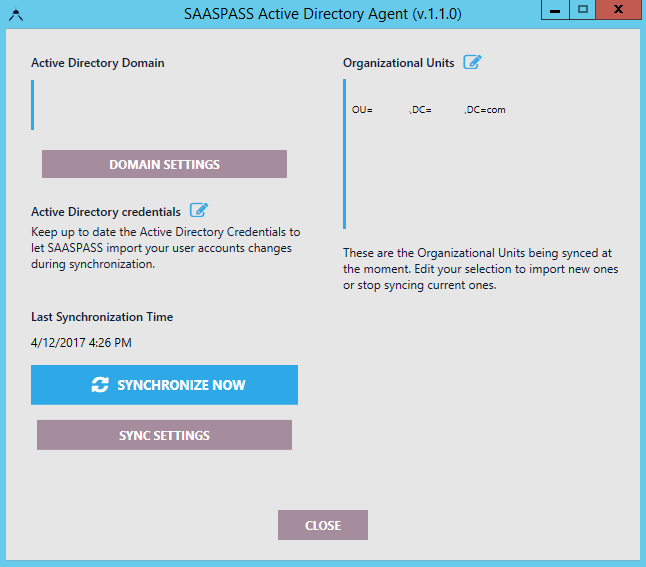
STEP 12
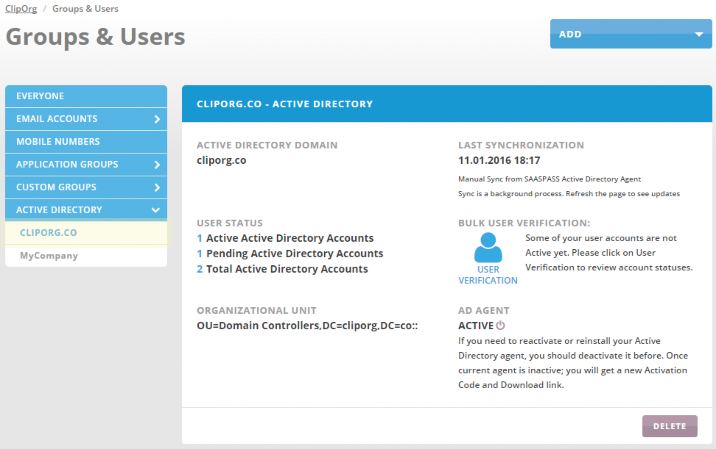
After successful configuration of SAASPASS AD Agent and successful synchronization, in your SAASPASS Admin Portal in your newly created Active Directory, you can see what time was the last synchronization and also how many groups and users were imported with the synchronization.
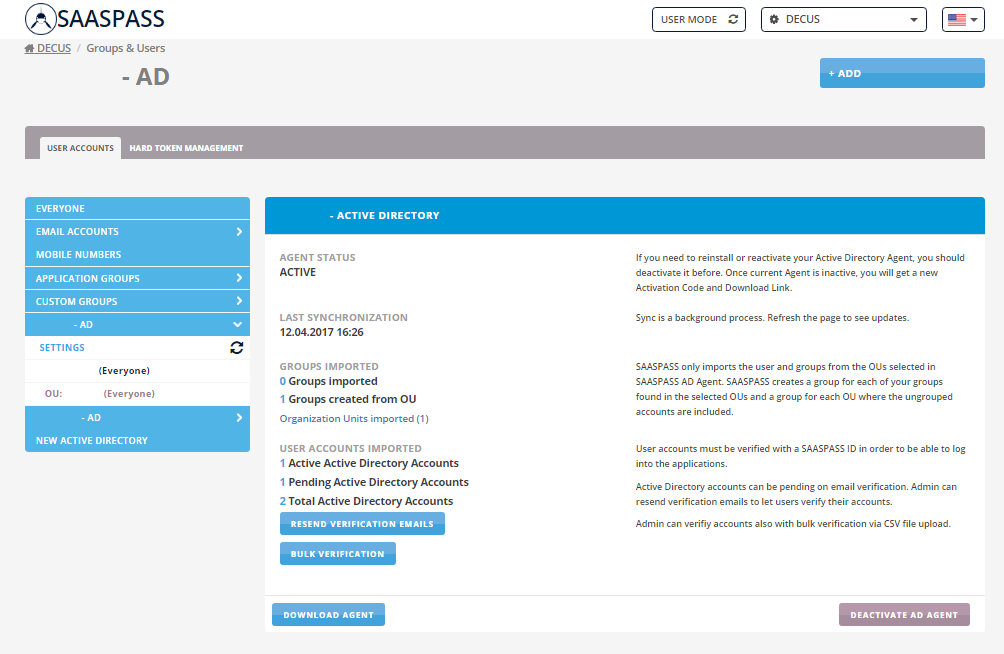
BACK TO SAASPASS ADMIN PORTAL
Open again your company admin portal and go to Groups&Users.
Under the Groups tree you can see your Active Directory added, created and the different groups of user accounts displayed.
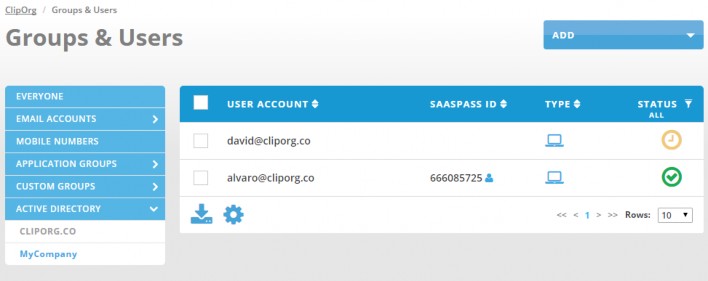
Those groups of users are ready now to be assigned to your different applications protected with SAASPASS.
To use SAASPASS to protect your Active Directory domain, you need to ensure that all your computers have already joined your Active Directory domain.
For Windows computers, to join to the Active Directory domain please follow the link:
http://windows.microsoft.com/en-us/windows/connect-computer-domain#1TC=windows-7CREATING COMPUTER LOGIN APP
From the portal you need to create a "Computer Login" application.
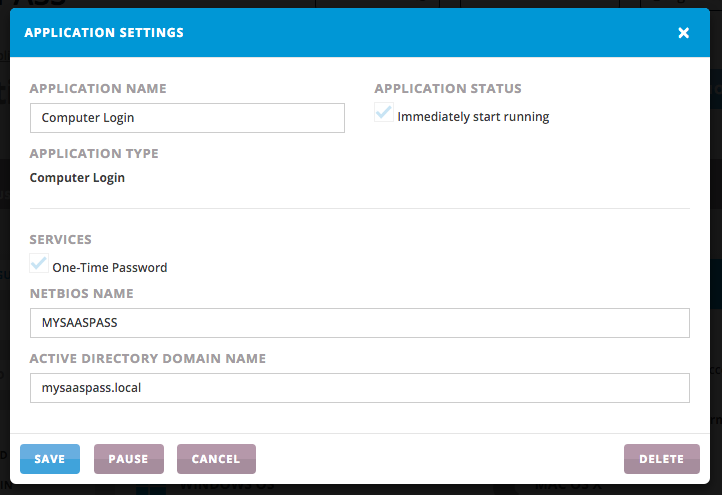
You need to download the computer connector from the button below.
DOWNLOAD SAASPASSThere are two ways to deploy your SAASPASS Connector to networked Windows machines:
- Using an AD/LDAP managed system
- Into a centralised AD networks depending on your security policies
- Through Group Policies Objects (GPO)
- Without centralized administration server:
- PDQ Deploy
- GFI LanGuard
- Suitable patch management tool from the management machine can be used to achieve the same result.
DEPLOYMENT TO AN AD/LDAP CONNECTED SYSTEM
Assigning Software
- If you assign the program to a user, it will be installed when the user logs into the computer. When the user starts the program, the installation will be completed (this is useful in cases where the network has a BYOD policy).
- If you assign the SAASPAAS to a computer the installation will start when the computer boots up and will be installed for all users who log in to that computer.
Publishing
- The SAASPASS connector will be published to one or more users. SAASPASS will be added to the Add/Remove program menu and a user will be able to install it from there.
ASSIGNING THROUGH GROUP POLICIES OBJECTS (GPO)
STEP 1
Create a distribution point on the publishing server by:- Logging onto the server as an Administrator.
- Create a shared network folder (this folder will contain the SAASPASS.msi package).
- Set permissions on this folder in order to allow access to the distribution package.
- Copy the SAASPASS.msi in the shared folder.
STEP 2
In order to create an object for your package:- Click on the Start button, go to Programs, select Administrative Tools and then select Active Directory Users and Computers.
- Select the Group Policy tab and click New.
- Set the name of the policy (for example SAASPASSWindowsConnector).
- Click Properties and select the Security tab.
- Check the Apply Group Policy checkbox only for the groups to which the policy will be applied and click OK.
- Right-click your domain name in the console tree and select the Properties context menu.
- Go to the Group Policy tab, select the object you want and click Edit.
STEP 3
In order to assign a package:- Click on the Start button, go to Programs, select Administrative Tools and then select Active Directory Users and Computers.
- Expand Software Settings under Computer Configuration.
- Right-click Software Installation, select the New context menu and then click on Package.
- In the Open dialog type the full UNC path of the shared package you want to assign.
- Click on the Open button.
- Click on Assigned and then click OK (the package will be added to the right pane of the "Group Policy" window.
- Close the Group Policy snap-in, click OK and exit the Active Directory Users and Computers snap-in.
- When the client computers start, the assigned package will be installed automatically.
PUBLISHING THROUGH GROUP POLICIES OBJECTS (GPO)
STEP 1 & 2
See steps 1&2 in Assignment.STEP 3
In order to plublish a package:- Click on the Start button, go to Programs, select Administrative Tools and then select Active Directory Users and Computers.
- Right-click your domain name in the console tree and select the Properties context menu.
- Go to the Group Policy tab, select the object you want and click Edit.
- Expand Software Settings under User Configuration.
- Right-click Software Installation, select the New context menu and then click on Package.
- In the Open dialog type the full UNC path of the shared package you want to publish.
- Click on the Open button.
- Click on Publish and then click OK (the package will be added to the right pane of the "Group Policy" window).
- Close the Group Policy snap-in, click OK and exit the Active Directory Users and Computers snap-in.
- Test the package:
- Log onto the target computer.
- Click on the Start button and go to Control Panel.
- Double-click the Add or Remove programs applet and select Add New Programs.
- In the Add programs from your network list select the program you published.
- Use the Add button to install the package.
- Click OK and then Close.
DEPLOYMENT THROUGH PDQ DEPLOY
A PDQ Package contains the installation files and instructions to silently install an application using PDQ Deploy similar to assignment via GPO Policy.
STEP 1
Create The Package- Create your first package by clicking File > New Package. Give the package a descriptive name.
STEP 2
Point To The Installation Files- On the left tree window click on Step 1. Click the ellipsis button and point to your setup file (saaspass.exe or saaspass.msi).
STEP 3
Make Your Installation SILENT- If using the MSI package you can skip this part, since the installation is silent by default, otherwise if using the exe append the switch to the parameters field.
STEP 4
Deploy- Close the window. Your installer has been created. Simply click Deploy Now to choose your targets and you can start the deployment straight away.
*Refs:http://www.adminarsenal.com/pdq-learning/create-pdq-packages http://www.adminarsenal.com/pdq-deploy
UPDATE SAASPASS WINDOWS DESKTOP CONNECTOR
Using an AD/LDAP managed system: When SAASPASS.msi update is available you need to redeploy the package. In order to redeploy it:
- Click on the Start button, go to Programs, select Administrative Tools and then select Active Directory Users and Computers.
- Right-click your domain name in the console tree and select the Properties context menu.
- Go to the Group Policy tab, select the object you used to deploy the package and click Edit.
- Expand the Software Settings element (per-user or per-machine) that contains the deployed package.
- Expand the Software Installation element which contains the deployed package.
- Right-click the package in the right pane of the Group Policy window.
- Select the All Tasks menu and click Redeploy application.
- Click the Yes button for reinstalling the application wherever it is installed.
- Close the Group Policy snap-in, click OK and exit the Active Directory Users and Computers snap-in.
Without centralized administration server:
- A management user (Administrator account) with the same password credentials must exist on all machines that are managed
- Use of a tool of the management system that will be used to deploy the SAASPASS connector